To winterize outdoor faucets, start the same way whatever kind you have: take the hose off before the first freezing night. On a frost-free faucet, that's most of the job. A standard hose bibb also has to be shut off and drained from inside. Plan on a few minutes per faucet, plus a trip to the basement for each bibb.
The failure to watch for is a frost-free faucet that splits inside the wall with a hose still on it. It won't leak until you turn it on in spring. The steps here come from Woodford's faucet documents and Boshart's instructions for hose bibbs and wall hydrants, so check your own faucet's sheet if you have another make.
Before you start
- A pail for the water that comes out of the indoor valve
- A flashlight for the basement ceiling or crawl space
- A spot indoors for the hose
Do the job before the first night that could reach 32 °F. A Texas A&M AgriLife fact sheet says pipes can freeze and burst at 20 °F or below, so it's tempting to wait. Boshart's rule for frost-free faucets is stricter: no hose on the faucet if there's any chance of freezing, even for a few hours overnight. We'd follow Boshart, because taking a hose off early costs you nothing.
Find out which faucet you have
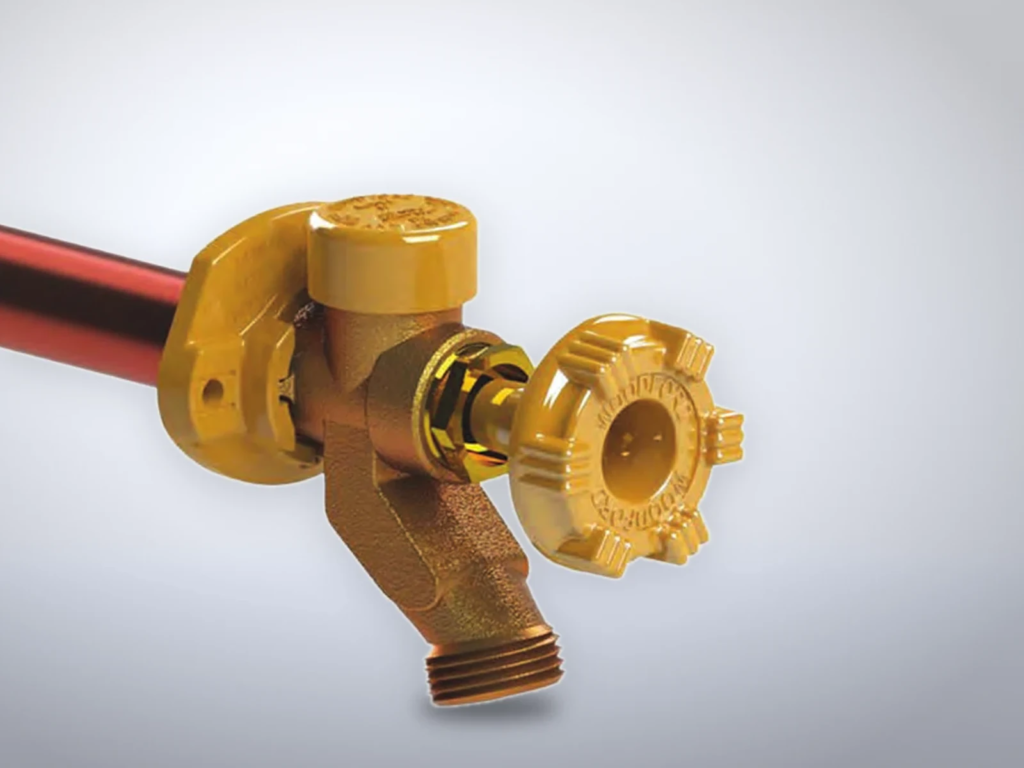
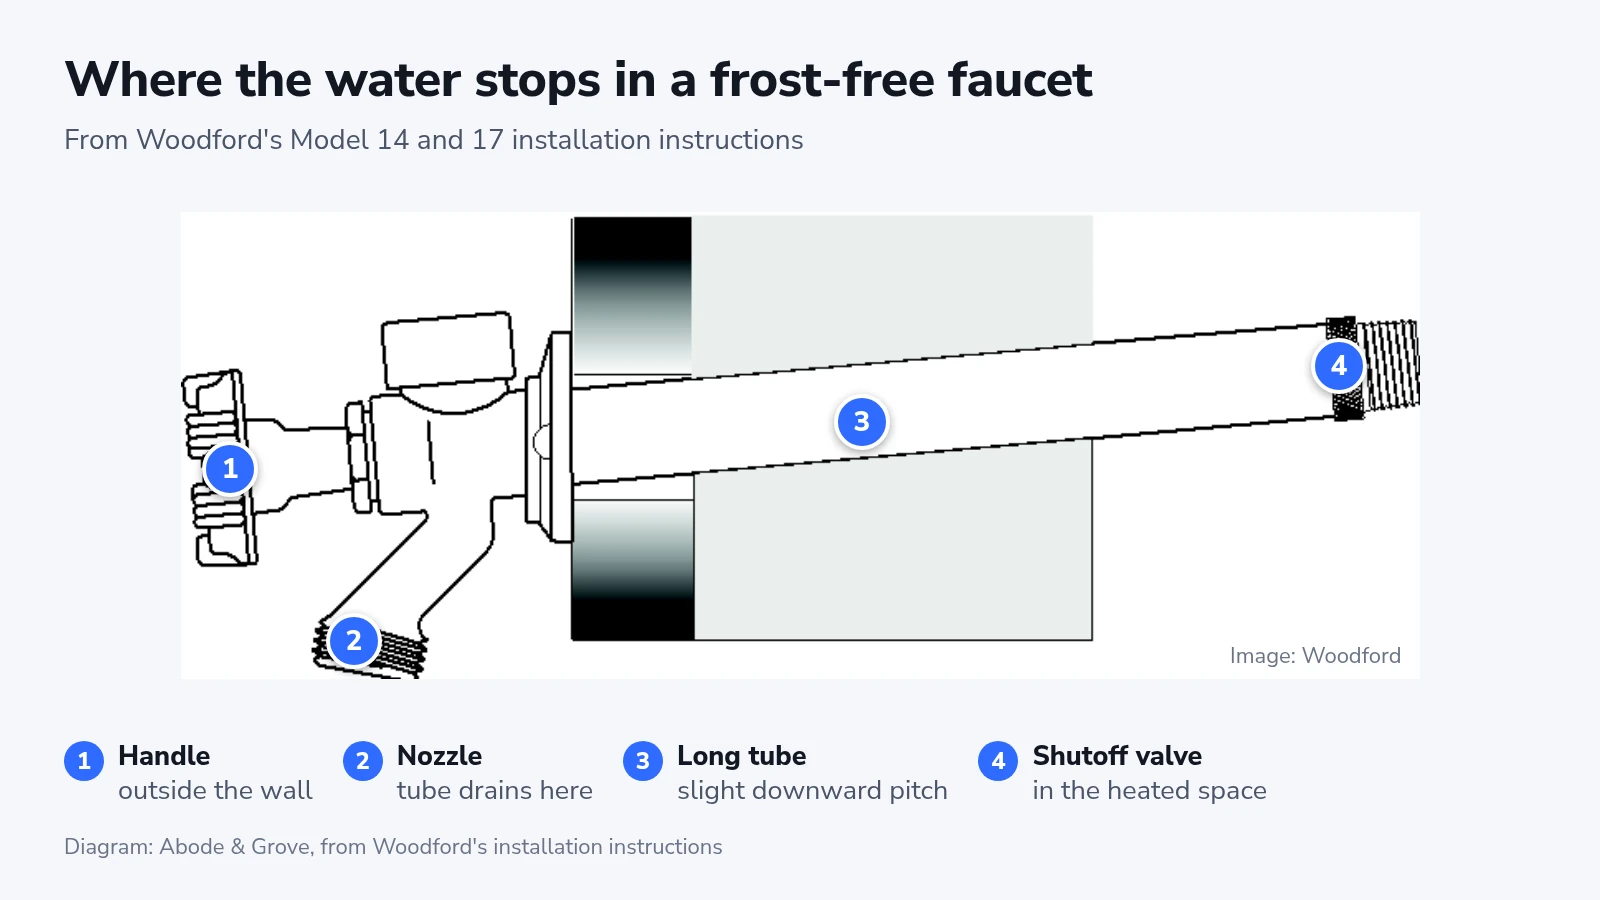
The two types differ in where the valve sits. A standard hose bibb has its valve close to the spout, so the whole thing freezes on an outside wall at freezing temperatures. A frost-free faucet, also sold as freezeless or frost-proof, has a long tube that puts the shutoff inside the heated part of the house.
Woodford lists sillcock, hose bibb, spigot and hydrant as names for the same wall faucet, so go by the hardware:
- Look indoors where the supply pipe reaches the wall. A frost-free faucet's long tube comes through the wall and joins the pipe there. Woodford makes its Model 17 for walls from 4 to 24 inches thick.
- Look at the faucet. Woodford's wall flange reads "REMOVE HOSE OR FAUCET MAY FREEZE AND BURST", and its online Faucet Finder identifies a model from the handle and the casting marks.
- Check the model number against the manufacturer's instructions. Brief dripping after shutoff alone does not reliably identify a frost-free faucet. If the pipe is hidden and the model is unclear, ask a plumber before choosing a winterizing routine.
Each setup needs a different routine:
| What you have | What winter takes |
|---|---|
| Frost-free faucet, inlet in a heated space | Take the hose off. The water stays on. |
| Frost-free faucet, inlet in an unheated space | Take the hose off, then drain it from an indoor valve. |
| Hose bibb with an indoor valve | Take the hose off, then drain it from the indoor valve. |
| Hose bibb with no indoor valve | Take the hose off, cover the faucet and add a valve. |
Take off the hose and anything else on the spout
Do this on every outdoor faucet.
- Walk around the house and find every outdoor faucet.
- Close the faucet and unscrew the hose.
- Remove anything else threaded onto the spout, such as a splitter, a sprinkler timer or a manifold.
- Open the faucet for a few seconds, then close it.
A frost-free faucet should empty itself when you close it. Water stops running from the spout, and the tube stays dry until you use it again.
A splitter or timer is as bad as a hose. Woodford's warning covers "a hose or other restriction", and Boshart says never to use these devices on its wall hydrants, partly because they get forgotten and stop the faucet from draining.
With the spout blocked, water stays in the tube and freezes from the outside of the house inward, Woodford explains. Once the ice reaches the shut-off faucet, the pressure has nowhere to go and the copper tube bursts. Only a few drops escape, so nothing shows indoors. The split sits past the shutoff valve, so the real leak waits until you next open the faucet, and that can be months later.
Extra checks for a frost-free faucet
A frost-free faucet in a heated wall can stay in service all winter once the hose is off. Keep the water on and the handle closed, following its manufacturer's winter instructions. An insulated cover may add protection, but it cannot substitute for removing the hose or correcting an installation that traps water.
The tube has to slope down toward the spout. Woodford calls for a slight downward pitch, and Boshart sets a minimum of 5 degrees. A faucet that tilts back toward the house traps water in the tube, so have it reinstalled.
The shutoff end has to stay warm, in a space that never drops below freezing. If it sits in an unheated garage or crawl space, or in a cottage that isn't heated all winter, the faucet needs a drain valve indoors and the same routine as a hose bibb.
A frost-free faucet can still freeze, University of Illinois Extension warns, depending on how cold it gets and how well the wall is insulated. Woodford's Model 19 sheet asks for insulation around the faucet and a sealed gap between the faucet and the house, so seal any gap you can see around the flange.
If a frost-free faucet has a vacuum breaker screwed onto the spout, check which type it is. A manual type needs its drain tab held to the side so the faucet can drain. An auto-drain type opens by itself when the hose comes off.
Some models have pressure relief or automatic draining features. Follow the instructions for the exact model, and remove the hose for winter even if the faucet has extra freeze protection.
Drain a standard hose bibb from inside
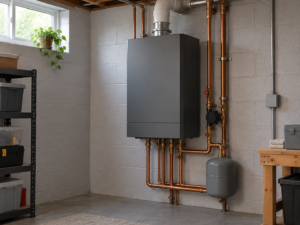
The indoor valve is normally at the basement ceiling, just inside where the supply line goes out through the wall. A winterizing valve may be a multi-turn stop and waste valve or a ball valve fitted with a drain port. Not every shutoff has a drain. Confirm which line it serves and identify the drain from its instructions before opening it. Do not loosen the valve body or pipe fittings.
- Close the indoor valve.
- Go outside and open the outdoor faucet. Some water runs out, then it stops.
- Go back inside, hold a pail under the port and remove the bleeder cap. The rest of the water drains.
- If the faucet has a manual-drain vacuum breaker, hold it open until it stops dripping. An auto-draining one needs nothing.
- When the dripping stops, replace the bleeder cap.
- Leave the outdoor faucet open.
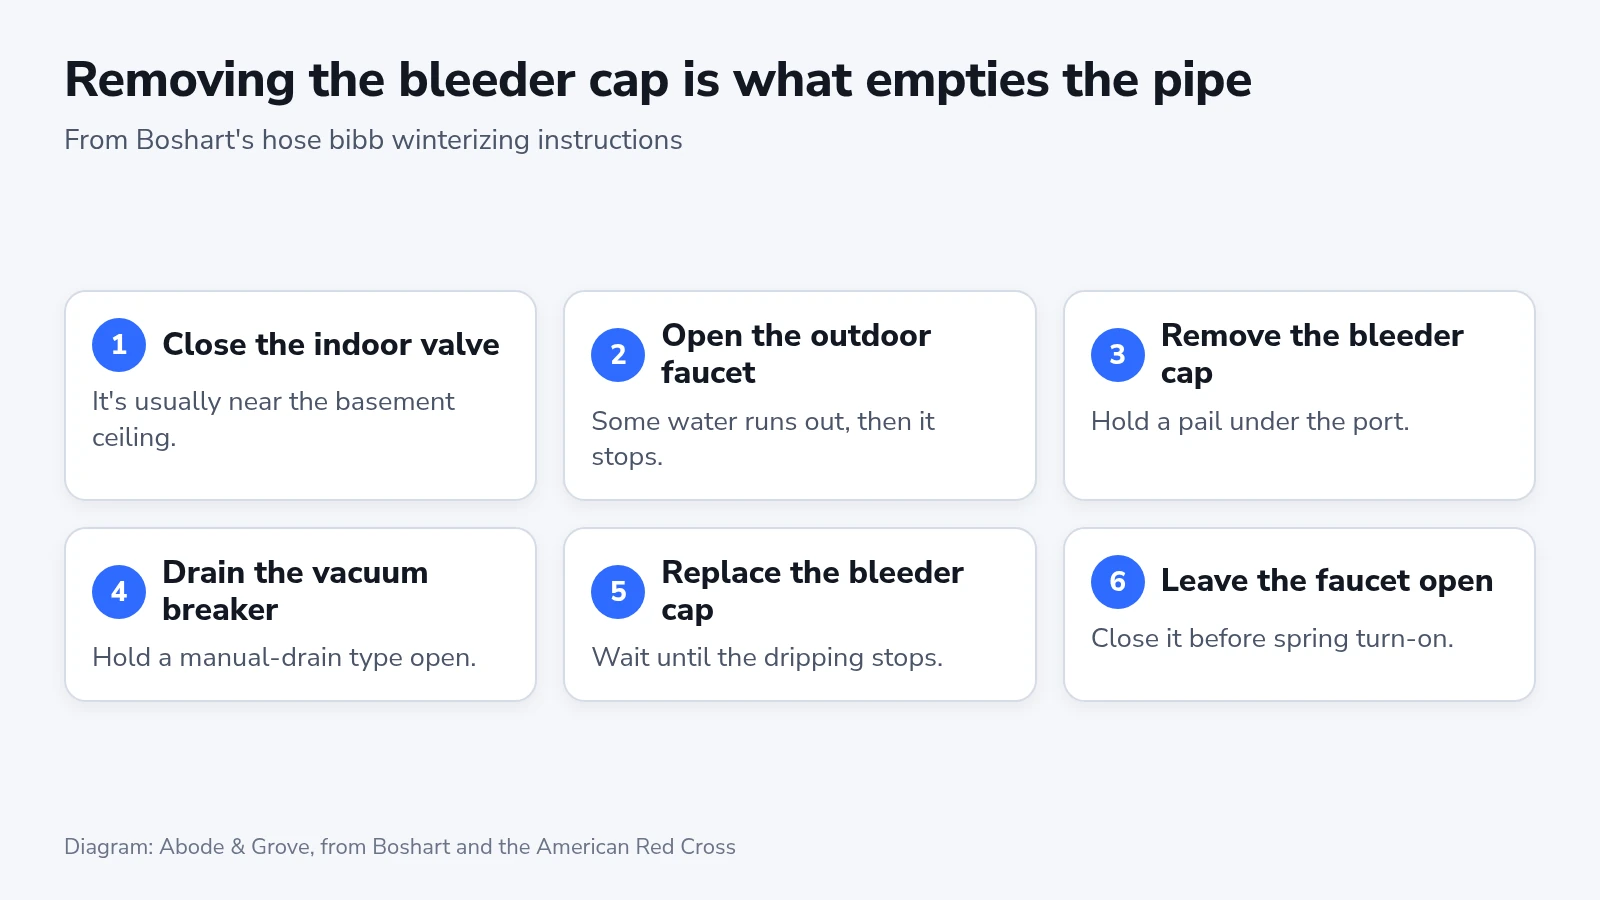
Air has to get into the line before the last of the water can leave. Removing the cap breaks that air lock, which is why a faucet can stop running at step 2 with water still in the pipe.
Open or closed for the winter
The instructions disagree on step 6. The American Red Cross says to keep the outside valve open, so any water left in the pipe can expand without breaking it. Boshart ends by closing the outdoor faucet. For a standard hose bibb drained behind a closed indoor shutoff, the steps here follow the Red Cross advice to leave the outside faucet open. Follow a different position if your faucet or winterizing valve manufacturer specifies one.
This applies only after you've closed the indoor valve. A frost-free faucet with the water still on stays shut.
No indoor valve, or no drain cap
Older homes often have no proper indoor shutoff, Boshart notes. A valve with no drain cap should be replaced with one that has it. The other answer is a frost-free wall hydrant with a built-in vacuum breaker in place of the outdoor faucet. Ask a plumber which setup suits the wall and heated space. Both changes require work on the water supply.
Ask a plumber about freeze protection before cold weather arrives. An insulated faucet cover adds insulation, but it does not drain the water or guarantee protection during a prolonged freeze.
Drain and store the hose
Rain Bird rates its Premium Rubber Hose down to -40 °F, so the cold alone isn't what ruins a hose. Its warning is about the water left inside.
- Take off the spray nozzle.
- Stretch the hose out and lift it, hand over hand, from one end to the other until the water stops coming out.
- Coil it and hang it on a curved hose rack indoors, never over a nail or a sharp object.
- Keep it away from hot pipes and heaters.
A shed or garage will do. A disconnected hose can even hang outside, the University of Georgia says, though storing it drained at a steady temperature makes it last longer.
In-ground sprinklers and drip lines are a separate job. Follow the installer's winterizing instructions for that system.
If water won't stop or something freezes
Water that keeps dripping from a frost-free spout after you close it points to a worn valve seat rubber or a loose retainer screw, according to Woodford. Fix it before winter, because a faucet that won't shut off can't empty. Use the repair instructions for the exact model or have a plumber repair it. A damaged valve seat may require faucet replacement.
The indoor valve probably isn't closing if water keeps flowing at the bleeder port without tapering off. Put the cap back on and have the valve replaced before freezing weather.
A hose frozen to the faucet should stay put until it thaws. The University of Georgia warns that frozen hoses are fragile and can break when moved. Take it off once it thaws, then treat that faucet as suspect until the spring check.
A faucet that gives only a trickle in cold weather probably has a frozen pipe. If the pipe is safely accessible and there is no leak, keep the faucet open and warm the pipe with a hair dryer, an electric heating pad or towels soaked in hot water. Keep electrical equipment away from water. Never use a blowtorch or any other open flame. Call a licensed plumber if you can't find or reach the frozen section.
The spring check
The first turn-on of the year is when a split tube shows itself, so have a second person ready.
- On a hose bibb, close the outdoor faucet, check that the bleeder cap is on, then open the indoor valve.
- Ask someone to watch the wall and ceiling where the faucet's pipe comes through.
- Open the outdoor faucet and let it run.
Woodford's troubleshooting sheet for the Model 17 sorts the leaks by where they appear:
| Where it leaks with the faucet on | What Woodford says |
|---|---|
| Around the stem, behind the handle | Tighten the packing nut until snug |
| From the top of the faucet | The vacuum breaker is fouled or damaged, so clean or replace it |
| Inside the wall | The tube has burst, so replace the faucet |
If you find water inside, close the outdoor faucet and its indoor supply valve if accessible. Check whether the leak has stopped, and leave the supply off until a plumber repairs it. Do not assume that closing the outdoor handle has isolated every possible leak.
Repeat the hose step and any draining every fall, before your first freezing forecast.